

1. Setting Up Your Stall: Your Handle and the Three-Step Setup
Your stall name becomes your @handle and is locked for good. Then three setup screens and a tap on Go live. About ten minutes, free, no card to start.
Most people who mean to set up a stall never quite get to it. Not because it is hard, but because it sits on the list next to everything else, and there is always a fence to fix.
So here is the whole thing, start to finish. It takes about ten minutes, it is free, and you do not need a card to begin.
Two things are worth doing properly rather than quickly: your stall name, which becomes your handle, and your hours. Almost everything else you can change later. The name and handle you cannot.
First: claim your handle
Your handle is your address on SideStall. It looks like @thehilltop, and it gives you a page at sidestall.au/stall/@thehilltop that anyone can open, whether or not they have the app.
It matters more than it looks, for a reason that is not obvious.
Your handle is how someone finds you deliberately. Search on SideStall matches what you have listed, so someone typing “eggs” or “sourdough” finds your products. Typing your stall's name does not find you. So when you tell people where you are, give them your handle or your page link, not your business name. Put sidestall.au/stall/@yourhandle in your Instagram bio and on the sign at the gate, and it works every time.
You do not type a handle separately. The app derives it from your stall name as you type, and shows a green tick when it is available. If the name is already taken, a number goes on the end, so a stall named “TheHilltop” might become @thehilltop1. Pick a stall name that is short and obvious, the name people already call you, because that is where your handle comes from.
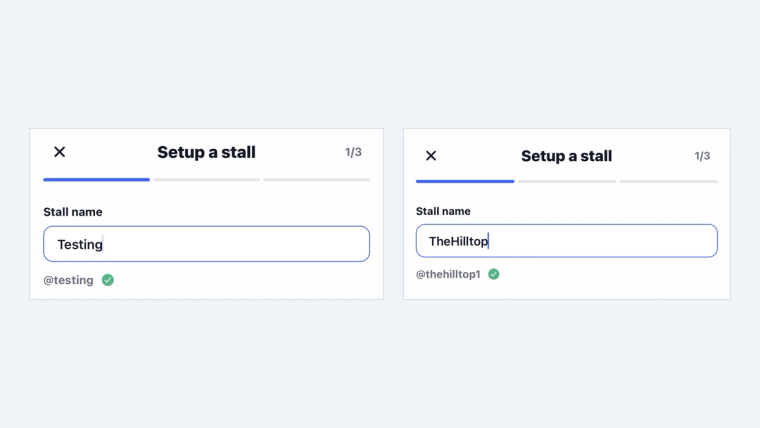
One thing to know before you type anything: pick a name you'll keep, because name and handle can't be changed once the stall is created. Both are locked from then on, and your printed signs, your bio and your regulars' bookmarks will all point at that handle.
Then: the three-step setup
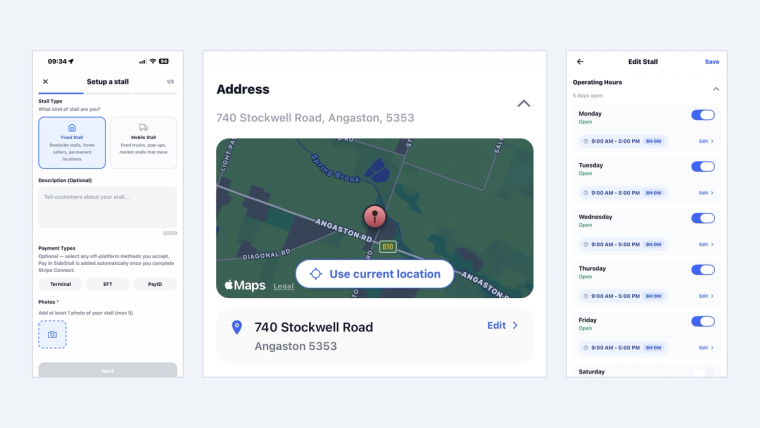
Setup is three screens with a progress bar across the top (“Setup a stall, 1/3”), in this order.
- Your details. Your stall name, what you sell, and a line about who you are, plus your stall type: Fixed Stall (“Roadside stalls, home sellers, permanent locations”) or Mobile Stall (“food trucks, pop-ups, market stalls that move”). This screen also asks for at least one photo of your stall, and lets you tick any off-platform payment methods you already take, such as Terminal, EFT or PayID. Pay-in-app is added automatically once you finish Stripe. The description is what a buyer reads when deciding whether to drive out, so it is worth two proper sentences rather than “fresh produce”.
- Your map pin. Where you are. Enter your address, check the pin the app drops on the map, or tap “Use current location”. If you sell from home, there is nothing extra to do here: your exact address is hidden by default, and buyers see an approximate area instead. There is more on that in a later post.
- Your hours. When you are usually open. You set each day with its own toggle and open and close times. This is what tells buyers you are trading, and it is how they decide who to visit this afternoon.
If you get interrupted partway, and you will, because something always needs doing, your progress is saved. Come back and carry on from where you stopped.
What actually changes when you finish
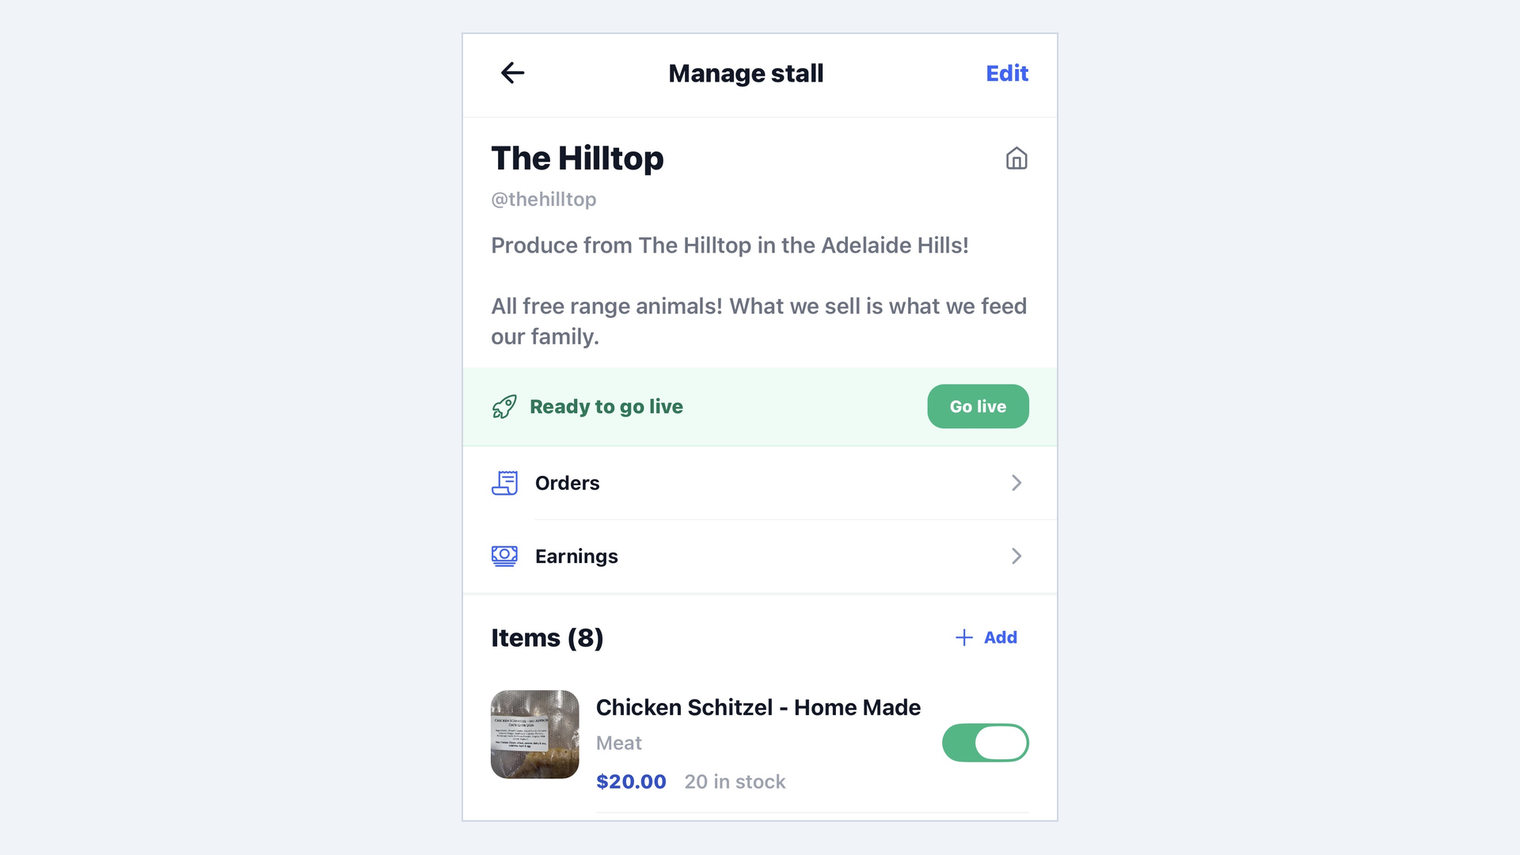
Finishing the three screens does not put you on the map. Your stall lands on the Manage stall screen with a green Ready to go live banner, and tapping Go live there is what turns on the three things below.
- You appear on the map for people nearby, sorted by how close they are.
- You have a page to send people to, one link that works in a text message, a Facebook comment or a bio.
- You can take payment if you want to, once your Stripe setup is done. There is no monthly fee to take payments on any plan, including Free. A small platform fee plus card processing applies only when a buyer actually pays in the app, and cash at the gate is entirely between you and your customer.
What has not happened yet is the part people expect: nobody knows you are there. The map shows you to people who are already looking. Getting in front of the ones who are not is what your handle link is for, and it is the single highest-return thing you can do in the first week. Send it to your existing customers and put it wherever your name already appears.
Before you close the app
Two minutes of housekeeping that saves you a fortnight of wondering why nothing is happening:
- Add one product, even if it is your only one, then tap Go live on the Manage stall screen. An empty stall gives a buyer nothing to decide on, and a stall that is not live is on nobody's map.
- Set your operating hours for the days you actually trade. The green Open badge buyers see is worked out from those hours.
- Send your link to five people who already buy from you.
That is the whole setup. Listing properly and keeping yourself visible are the next post.
Ready to start? Set up your stall. It is free, and no card is needed.